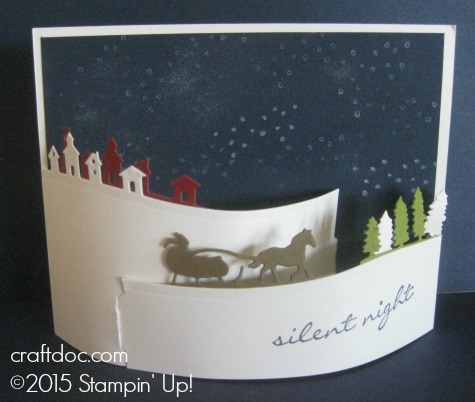
Sleigh Ride Bendi Card Tutorial
I wanted to make a 3-D bendi card using the Sleigh Ride Edgelits to make the curvy panels. I’ll show you step by step so you will have an easier time figuring it out than I did!
Today’s Tips:
-The measurements are not in stone – they can be eyeballed to get the size flaps and curvature that you want.
1. Cut 2 pieces of Thick Whisper White Cardstock to 5 – 1/2 by 4 – 1/4. One will be the center panel of the card, the other cut in half for the small folding panels.
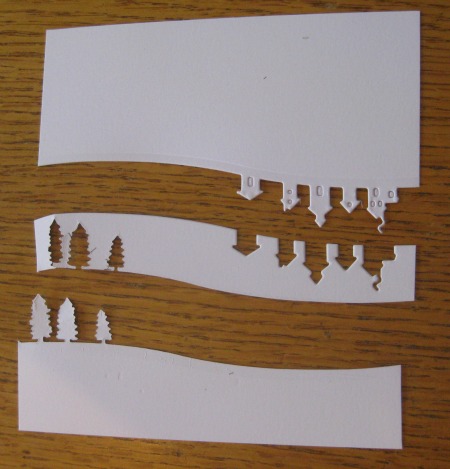
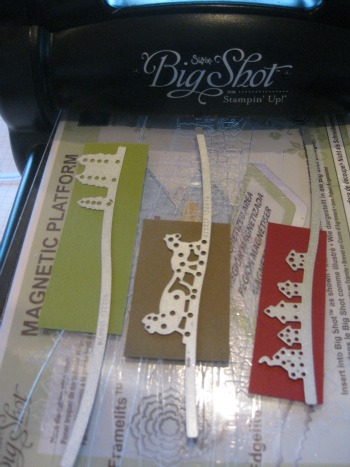
2. Cut about an inch off one of the pieces with the tree die.
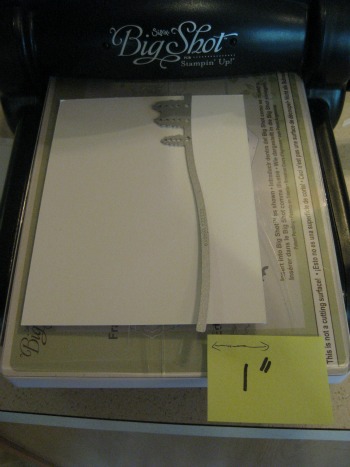
2. Flip the wrong side over, and cut this time with the house die.

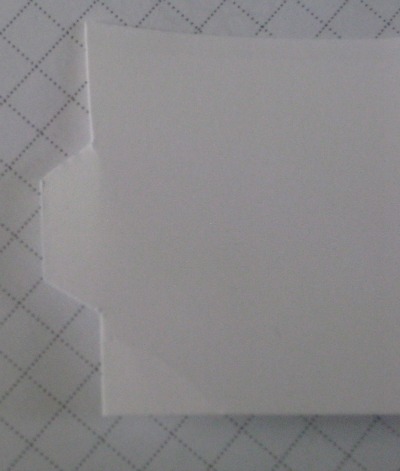
The middle section will be discarded. Also trim off the house and tree on the edge, these will get in the way of the fold. You can trim them all off, if you don’t want white ones. Save the trimmed pieces to add back if you wish.
3. The tallest side of each panel needs to be scored at 1/2″ to adhere to the middle card panel.
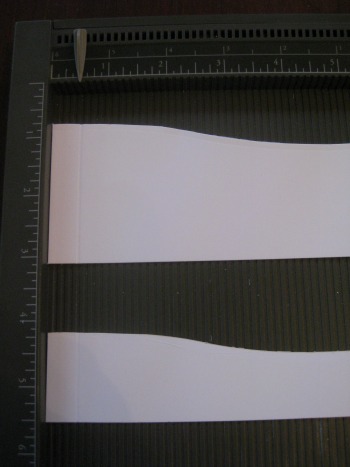
4. On the other side of each panel cut make a small tab, about 1/4″ inches in.
5. From scraps of cardstock (here Soft Suede, Cherry Cobbler, Old Olive) cut a small panel for each of the sleigh ride dies. Adhere to the back of the small Whisper White panels.
5. Adhere the scored sections of the 2 small panels to each side of the large white panel.
6. Add a panel (5-1/4 x 4″) of Night of Navy that is stamped in Whisper White with the snowflakes from the coordinating Jingle all the Way stamp set and sponged with Whisper White ink. (You can buy both the dies and stamps together as a bundle for 15% off in my website shop.) Stamp the Silent Night sentiment in Night of Navy ink.

7. Cut two slits (using a craft knife) to insert the tabs. You can judge how “bendi” you want the card. I did mine about 1-1/2 inches from the right in the main panel, and from the left in the bigger flap (to insert the small flap).
Fold up to mail. You may want to include instructions to insert the tabs into the slots. Then your Christmas card will be one that is on display in the recipient’s house.
Hope you enjoy this project. Check out my Stampin’ Up! website and sign up for my monthly newsletter for more news and projects.
No Comments »
No comments yet.
RSS feed for comments on this post.
Leave a comment
Line and paragraph breaks automatic, e-mail address never displayed, HTML allowed: <a href="" title=""> <abbr title=""> <acronym title=""> <b> <blockquote cite=""> <cite> <code> <del datetime=""> <em> <i> <q cite=""> <s> <strike> <strong>