Simplified Ornament Tutorial
Here’s the tutorial I promised my club members for the ornament I made from the Ornament Keepsakes stamp set and Holiday Ornament Framelits. This ornament is a simplified version of the one on the cover of the minicatalog and went together very quickly.

1. Stamp 10 ornaments (I used Lucky Limeade ink), and cut out with the corresponding framelit.
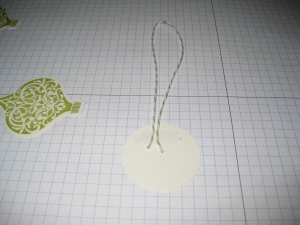
2. Cut a 1 – 3/4″ cardstock circle for your base. Adhere a Lucky Limeade Baker’s twine hanger.
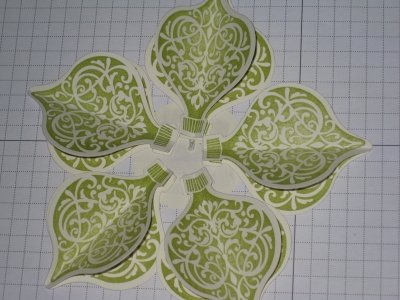
3. Adhere 5 of the ornaments around the circle – leave a gap in the center.
4. Score the other 5 ornaments in half and fold slightly. Run a thin line of Mono Multi Liquid Glue down the back of the crease and adhere on top of the flat ornament. At this point you can add a third folded ornament for a more “full” look. Then you would need 15 ornaments and would put adhesive on half of the folded ornaments.
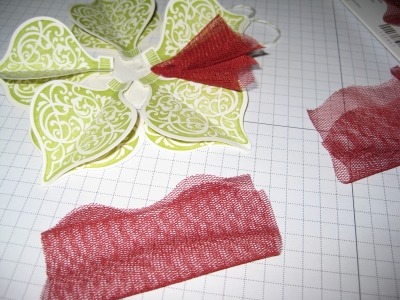
5. Cut 2 “scallops” worth of the Cherry Cobbler scalloped Tulle and fold in half. Pinch the center at the fold with your fingers and twist/gather into a tuft. Tuck 5 “tufts” of tulle behind the ornaments in the gaps. I used a glue dot and then a second glue dot to hold the 2 folded sections together. The scalloped tulle also comes in Crumb Cake and Early Expresso.
6. Next comes the rosette. Sorry I forgot to take a photo! Two ways to do this. If you are using the rosette die, use about a 1-1/2″ x 12″ strip of designer paper, since a piece at the edge will be cut off. If you are using the simply Scored tool, use a 1″ by 12″ strip and score every 1/2″. In either case, accordian fold the strip and adhere together at the end. Flatten the circle and adhere to a 1″ cardstock circle with hot glue.
7. Place 2-3 Stampin’ Dimensionals in the center of the ornament and add the rosette.
8. Add a Button and Pearl or other embellishments.
The ornament on the cover of the minicatalog has another whole row of smaller ornaments and some loops of linen thread. You may have to start with a larger circle to fit these in.
I hope you enjoyed this simplified version of the famous Stampin’ Up! ornament. Play around with the different ornaments and colors in other combinations. The possiblities are almost endless! All supplies can be purchased at my website www.kwstamps.stampinup.net While you are there, check out the October special which gets you the matching Paper Piecing Pack for FREE!
1 Comment »
RSS feed for comments on this post.
Leave a comment
Line and paragraph breaks automatic, e-mail address never displayed, HTML allowed: <a href="" title=""> <abbr title=""> <acronym title=""> <b> <blockquote cite=""> <cite> <code> <del datetime=""> <em> <i> <q cite=""> <s> <strike> <strong>
October 24th, 2012 @ 1:41 pm
Kim this is a great tutorial. I wasn’t even going to try and attempt making one of these until I saw your tutorial…they looked too intimidating. Now I definitely will! You are the best!