Folded Tea and Treat Holder Tutorial
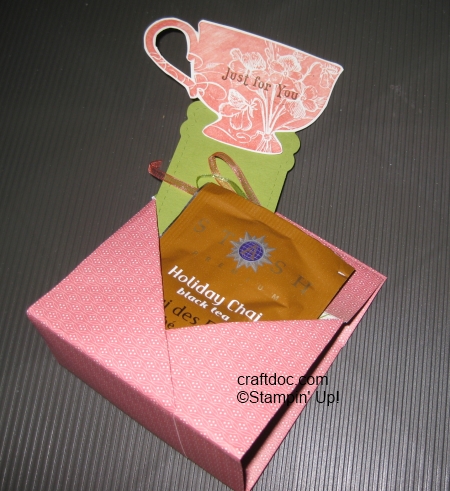
Here is the treat holder I learned to make at the San Antonio Regional Conference. No adhesive needed – just folding and ribbon. We will be making this at stamp class tomorrow – there’s still time to RSVP! There are 2 pockets for tea bags (and a bookmark), and you can slip a cello bag of cookies or other treats into the center.
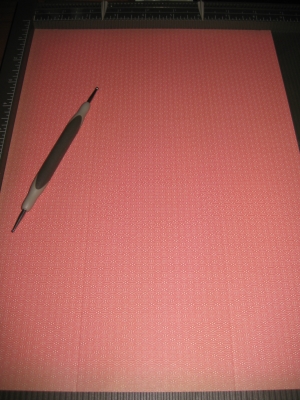
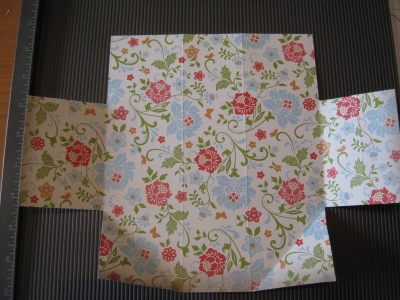
1. Remove 3 – 1/2″ from one side of a sheet of 12×12 designer paper. I used Everyday Enchantment (free during SAB).
2. Score on the 8- 1/2 side at 2-1/2″ and 6″
3. Score on the 12″ side at 1-1/4″, 2-1/2″, 5″, 7″, 9-1/2″, and 10-3/4″

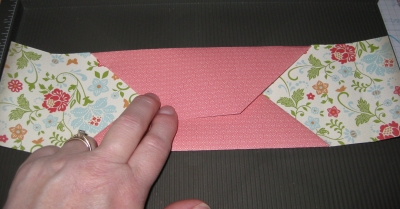
4. Cut off all 4 of the corners (2-1/2″ squares).
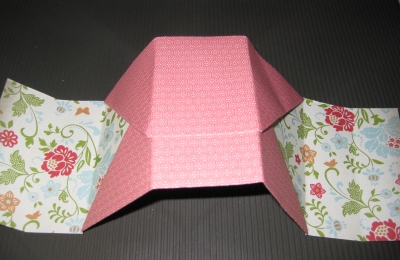
5. Fold up the next corners towards the center on the diagonal – you will be making new score lines for this step.

6. Fold in the 2 sections containing these diagonals towards the center to make your pockets.
7. The 2 middle score lines (5″ and 7″) now need to be folded to create the center opening.
8. The above photo is the bottom. Flip it over to finish up.

9. The remaining 1- 1/4″ flaps fold down toward the pockets. (You don’t use the remaining 2-1/2″ score lines – they are left from a previous step.) This is where you place your holes using the Crop-A-Dile for the ribbon – hold both sides together when punching. I used about 14″ of the Everday Enchantment Ribbon (free during SAB) to tie the treat holder together.
The bookmark is made from the Two Tags die and the Tea Shoppe Stamp set.
All products can be purchased at www.kwstamps.stampinup.net
Thanks for supporting my home business!
No Comments »
No comments yet.
RSS feed for comments on this post.
Leave a comment
Line and paragraph breaks automatic, e-mail address never displayed, HTML allowed: <a href="" title=""> <abbr title=""> <acronym title=""> <b> <blockquote cite=""> <cite> <code> <del datetime=""> <em> <i> <q cite=""> <s> <strike> <strong>